Wednesday, May 27, 2015

Panic - Fever and Ear Infection

Muimui is sitting here in the car with a smile.  She doesn't look sick at all...  but it was a different story just 12 hours ago.  

She was up all night long, waking every 30 minutes, tossing and turning, sitting up, complaining that her ear hurts constantly.  By morning, she was churning a 38.9 deg fever.  Although she'd been coughing for a few days now, I was hoping she'd get over it quickly...since we leave for our trip in 3 days.  Yup, 3 days!  I'm almost crapping my pants, just thinking about skipping the trip.  

Anyways, having that Mommy's intuition, I had a feeling she has an ear infection.  I took her into the docs office after work and in less than 5 minutes, the diagnosis was made.  She has an ear infection.  Of course, I panic anyways, asking the doc if she can fly since we are going on a trip this weekend and we paid for everything already and there are no refunds...  The doc goes and says:  No problem.  

Yay!  So off we go to pick up the prescription for antibiotics and that was it.   

Saturday, May 23, 2015

21 Months - Josh

Took a couple of snapshots of little daidai running around the house today.  He's now 21 months old. 

Josh is a very happy kid but too bad he doesn't know how to pose for pics yet.  It's so hard to capture him in action, since it makes the photo blurry.  He sure keeps us on our toes when he's awake (love those semi-quiet nap times in the afternoon).  I can usually get most of the cleaning done when he's snoozing away.  

Not much to report this month.  He's just climbing and running about.  I love that he can't talk quite yet but still can tell us what he wants by pointing and "a-ing".


Thursday, May 21, 2015

Disney DIY Shirts - Part 4 - Buttons

I've always wanted autographs of Disney characters and this upcoming trip will be the perfect opportunity for the girls to get them.  I considered doing a character meal so that we don't have to line up to see the characters, but it's quite expensive.  It'll cost around $50US/adult and $25/child.  Will it be worth it?  Or should we line up at the Greet and Meets?  Hmmmm.  Still deciding.

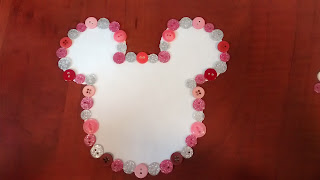
Now, what will the girls use to get the autographs?  A book?  Photos?  Pillow case?  T-shirt?  I recently saw a shirt where someone used buttons in the shape of Mickey’s head for the design.  Now, isn’t that a neat idea?  So I decided to do something similar:

I searched for a Mickey head outline and cut it out.  Then I bought buttons in different sizes and colors.  I organized the buttons into the Mickey head shape and put it aside.  I then glued the buttons onto the shirt.  I had to glue the buttons on in order for me to sew each button onto the shirt, or else the buttons will fly all over the place.  It took around 1.5 hours for each shirt.

My plan is to carry these white shirts in my backpack the first few days we are in the park and get the characters to autograph them when we see them.  Not sure how many signatures we'll get but we will see.  Will update later.

Saturday, May 16, 2015

Disney DIY Shirts - Part 3 - Glow in the Dark Fabric Paint


I've been working on our third set of  Disney DIY shirts.  I wanted something cool...like glow in the dark, so I went with that idea.  I used Tulip glow-in-the-dark puffy fabric paint.  We bought blue, purple, orange, green and neutral.  The paint cost around $12 (with a nifty 50% coupon).   The t-shirts were $3 at Michaels.

I used the freezer paper method.  I started off brushing the paint on, like how I did it last time.  I was under the impression that these glow in the dark paints are opague and thick.  But after the first coat of paint, I realized that the paint dried to an almost transparent non-color!  It may be because these t-shirts are black?  Not sure.  Anyways, these set of shirts gave me so much trouble.

Buzz Lightyear and Olaf the snowman were the first 2 glow-in-the-dark shirts that I did.  You can see how the white portion, is an off-white color, due to like 8 layers of paint.  So for Thumper the bunny and Tinkerbell, I bought white fabric paint and put a layer of white on first.  Then I added layers of the glow in the dark paint afterwards, which seemed to work much better.  Lesson learned.  I used around 4 layers of paint for Thumper and Tinkerbell.

I added the cost of fabric paint (silver, white and all the glow in the dark ones) and all the t-shirts, each of the painted shirts worked out to be $6 each.  And I still have half the paint left to do other crafts with the kids.  Deal.


Friday, May 15, 2015

Visit with Kau Fu and Auntie Drew

Kau Fu and Auntie Drew dropped in for a visit this evening.  They came just before we went to bed (thus kids are all in PJs already) but since we don't usually get to play with them much, we just had to run around the house and make lots of ruckus.  It was fun...hahaha.  Come by again soon!


Tuesday, May 12, 2015

Disney DIY Shirts - Part 2 - Fabric Paint


We've been working on our second set of Disney DIY shirts and this time, we used Tulip fabric paint.  We got some silver metallic paint and glow in the dark puffy paint.  The t-shirts were $3 each at Michaels.

I asked the girls to each choose a character for their shirts and I got to work on the freezer paper templates. I found a big roll of freezer paper at No Frill for $4.95.  I searched for an outline of the character, traced it onto the freezer paper and cut the outline out.  Then I ironed the shirts, ironed the freezer paper onto the shirts and pulled off the areas where I want paint to fill (I wanted a crisp edge so I ironed the freezer paper on like 5 times, just to be sure).  The girls wanted to help so they painted their own shirts! Look at how much fun they are having...


For little Daidai, the smallest t-shirt size was youth small and it was way too big for him so I did his on a blue onsie instead.  He loves dogs so I thought of the perfect character for his shirt.  Since Yee yee and Go Go are also going to Disneyland the same week we are going, we made a couple of shirts for them too.  Can you guess what all of these characters are?


Sunday, May 10, 2015

Disney DIY Shirts - Part 1 - Iron On Applique

In preparation for our Disneyland trip at the end of the month, I wanted the kiddies to wear Disney shirts each day we are at the park.  I considered buying the shirts but they were pricey ($20 each) so I thought making the shirts would be more fun and economical.


There's so many methods for these DIY shirts but I needed the first ones to be the easiest.  So I chose iron-on appliques.  I bought these Mickey/Minnie iron-on appliques on Aliexpress for $2 each and the t-shirts were on sale at Michaels for $3 each.  Once the appliques arrived in the mail, I just ironed them onto the shirt.  How easy is that?  But of course, I think they will fall off while I'm wearing them so I hand sewed these appliques onto the shirt, just for security.  It took around 30 minutes to sew them (5 shirts took around 3 hours).  Total cost - $27 for 5 shirts.  Not bad.

PS - Daidai will not be joining us this trip but I'm sure he will love wearing his Disney shirts.

Saturday, May 9, 2015

No More Pumping! Last Bag of Milk

This is it.  I've packed it up.  After 20+ months of sitting next to this pump, I'm finished!  

Good bye dear friend.  You've been a wonderful companion.  You always spent time with me, day and night, whenever I needed to release pressure.  I will remember those nights fondly with your calm wong, wong, wong sound.  Good bye, good bye.  

And we are using up the last of the stored frozen breast milk from the freezer too.  Bag #570 (10 bags of 6oz each in each large bag).  I can't believe the frozen milk lasted us this long.  It's a good thing I guess, save $ on buying rice milk.  

Now that Daidai is drinking rice milk full on, between Daidia and Muimui, they go through a litre of rice milk a day.